My sister in-law runs a dog training business in Queensland. Part of her business is to track records of her canine clients – especially notes, vaccinations when they’re due, medical records and certificates.
In a previous job she had experience with Animal Shelter Manager (ASM3). She’s familiar with the features and interface to know it will cover her needs.
Her business is not big enough to justify the price of the SaaS version of ASM3; so being the tech savvy (debatable) one the family – it was my task getting it up and running for her.
This lead to several nights of struggling, annoyance and failure.
Fitting the pieces together
To start off I wanted to get a demo version running so I can see what I need to do to deploy it for her.
Apart from a domain name that was sure to set off all the “appropriate content” filters at work; with a few modifications I could get it to work. Looking at the instructions from the author Ræn; it is substantially different to the old Dockerfile and the instructions on the ASM3 home page.
Let’s build it
With my base working version – I cobbled up some Dockerfiles for ASM3 and postres and a docker compose file to tie them together:
(Note that this is not a production version and have to obscure passwords etc in the final version)
The containers build just fine and fire up with no problem.
Vising the website
http://localhost/
ASM3 redirects and builds the database – but then goes to a login page. I enter the username and password; but it loops back to the login page.
I think the problem lies with the base_url and service_url in asm3.conf; possibly with http-asm3.conf settings.
Anyway – I logged a issue with ASM3 see if it is something simple that I missed; or maybe I have to start pulling apart of source code to find what it is trying to do.
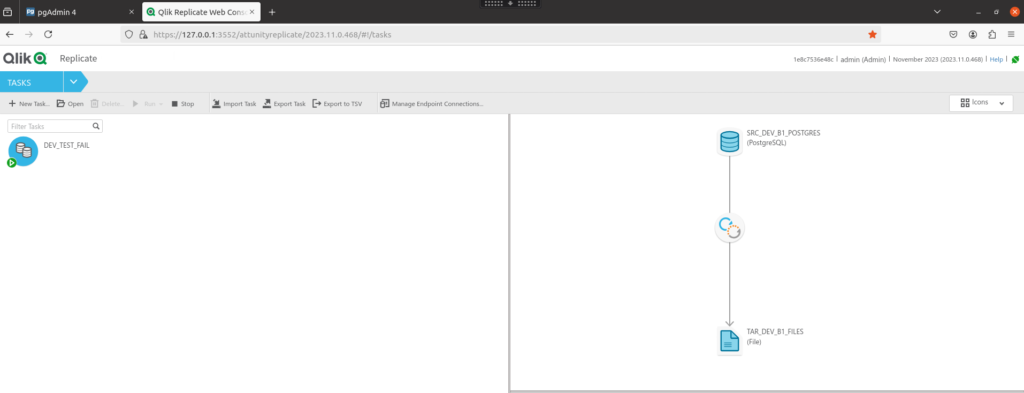
This error gives us problems; I can’t resume the task as the error re-appears. I can’t even start it from the stream position and must rely on restarting the QR task from a timestamp, which is extremely dangerous with the chance of missing out on data for that split of a second.
I suspect the problem is that the “staging” file on the QR server gets corrupted mid write when the server fails and when resume; QR can’t parse it.
But trying to recreate the problem in a safe environment to diagnose it is tricky. Our DTL environment doesn’t create enough traffic to trigger the issue. Also, I don’t want to be abruptly turning off our DTL QR servers and interrupting other people’s testing. As for trying to recreate the problem in production – the pain of all the red tape is not worth the effort.
I needed a safer space to work in. A space when I can pump through large volumes of data through QR and kick the QR service around trying to provoke the error. Armed with my little Linux VM – docker containers was the answer.
CentOS? Why CentOS?
My goal was to build a Docker container with Qlik Replicate and Postgres drivers so I can use it on my Linux VM.
Following the instructions I ran into some initial problems. The first major problem was using the Cent OS docker image. The issue was that I must use the packages in my company’s artifactory and not external packages. Although the company had CentOS; there was no other packages available to update and install. Since my VM cannot reach http://vault.centos.org; the CentOS image was a lame duck.
With CentOS off the cards, I had to use Redhat image that my company provided. With Redhat – the artifactory had all the packages that I needed.
The second problem was that I was wanting to use the 2023.11 image to match our environment. With 2023.11 there are some extra steps needed in the docker file compared to 2024.05. The differences is notated on Qlik’s support article.
The Dockerfile
Here is the Dockerfile
FROM my.companys.repo/redhat/ubi9


ENV QLIK_REPLICATE_BASE_DIR=/opt/attunity/replicate/
ENV ReplicateDataFolder=/replicate/data
ENV ReplicateAdminPassword=AB1gL0ngPa33w0rd
ENV ReplicateRestPort=3552
ENV LicenseFile=/tmp/replicate_license_exp2025-06-29_ser60038556.txt

# Copy across installation packages and licenses
ADD postgresql*.rpm /tmp/
ADD areplicate-*.rpm /tmp/
ADD systemctl /usr/sbin
ADD replicate_license_exp2025-06-29_ser60038556.txt /tmp/

# Update packages
RUN dnf -y update
RUN dnf makecache

# To get ps command
RUN dnf -y install procps-ng
RUN dnf -y install unixODBC unzip
RUN dnf -y install libicu.x86_64
RUN rm -f /etc/odbcinst.ini

# Installing posgres packages
RUN rpm -ivh /tmp/postgresql13-libs-13.9-1PGDG.rhel9.x86_64.rpm
RUN rpm -ivh /tmp/postgresql13-odbc-13.02.0000-2PGDG.rhel9.x86_64.rpm
RUN rpm -ivh /tmp/postgresql13-13.9-1PGDG.rhel9.x86_64.rpm

ADD odbcinst.ini /etc/

# Installing Qlik Replicate
RUN systemd=no yum -y install /tmp/areplicate-2023.11.0-468.x86_64.rpm
RUN yum clean all
RUN rm -f /tmp/areplicate-*.rpm

RUN export LD_LIBRARY_PATH=/opt/attunity/replicate/lib:\$LD_LIBRARY_PATH
RUN echo "export LD_LIBRARY_PATH=/usr/pgsql-13/lib:\$LD_LIBRARY_PATH" >> /opt/attunity/replicate/bin/site_arep_login.sh

ADD start_replicate.sh /opt/attunity/replicate/bin/start_replicate.sh
RUN chmod 775 /opt/attunity/replicate/bin/start_replicate.sh
RUN chown attunity:attunity /opt/attunity/replicate/bin/start_replicate.sh
RUN source $QLIK_REPLICATE_BASE_DIR/bin/arep_login.sh >>~attunity/.bash_profile
ENTRYPOINT /opt/attunity/replicate/bin/start_replicate.sh ${ReplicateDataFolder} ${ReplicateAdminPassword} ${ReplicateRestPort} ${LicenseFile} ; tail -f /dev/null
The postgres packages can be obtained from https://download.postgresql.org/pub/repos/yum/13/redhat/rhel-9-x86_64/
In the organisation that I work in; I have a good old Windows 10 ThinkPad that has been my work horse for many years.
It does the job and works happily with our on Prem apps and I can do most of my role’s development on it.
There are areas where the work horse cannot help me out. For instance, I needed to develop a JavaScript function on a Postgres database to split a field into different elements. I do not have access to be able to develop on the target database; so, I turned to Docker to run a containerised version of Postgres and pgadmin to have a safe area to play in.
The dreaded Linux VM
The “cool” developers have access to Macs to run their DevOps tools on.
I have a Linux VM, running Ubuntu 20.04 on.
It loads slow, it runs slow and the support VM application hogs a significant amount of the memory available, leaving little left for me.
But does allow me to run Docker containers.
The first container I created; broke the VM. The VM support team speculated that a port for Postgres or pgadmin broke the organisation’s VM ports. They rebuilt my VM and I tried again.
docker-compose.yml
This is my docker-compose.yml file for Postgres and pgadmin
There a couple of changes from the boiler plate docker-compose.yml files on the internet:
The ports are mapped to non-standard ports. This is to avoid any potential problems with ports conflicting with the VM software
I had to change the volumes to my home drive due to security settings on my VM
Errors, Problems and Issues (Oh my)
When initially running the docker-compose; I got the following error and pgadmin wouldn’t start.
pgadmin4_container | ERROR  : Failed to create the directory /var/lib/pgadmin/sessions:
pgadmin4_container |            [Errno 13] Permission denied: '/var/lib/pgadmin/sessions'
pgadmin4_container | HINT   : Create the directory /var/lib/pgadmin/sessions, ensure it is writeable by
pgadmin4_container |          'pgadmin', and try again, or, create a config_local.py file
pgadmin4_container |          and override the SESSION_DB_PATH setting per
pgadmin4_container |          https://www.pgadmin.org/docs/pgadmin4/8.9/config_py.html
This issue was resolved from an article from a Stack Overflow thread by changing the ownership of the pg_admin trigger to 5050
sudo chown -R 5050:5050 ~/apps/pg_admin
The next error I had was a “Can’t connect to (‘::’, 80)” error in pgadmin
Again Google and Stack Overflow came to the rescue. The issue was potentially caused if IPv6 is disabled on the VM. I added in the the following line to the yml file:
PGADMIN_LISTEN_ADDRESS: 0.0.0.0
This resolved the issue and now pgadmin could start up.
Inside pgadmin
When I got inside pgadmin; for the life of me I couldn’t connect to the Postgres database.
I could see that the Postres container was running with no errors. I could see the remapped ports. I could connect to Postgres with psql. Why couldn’t I connect to the Postgres in pgadmin?
I was frustrated and tired after a long day of work and had walked away from the computer.
When I got back after a walk around the block and a cup of tea – I could now see the problem and the solution:
Initially I was using “Hostname” as 127.0.0.1 and port as 9432. Because that’s where my mind went to how to connect to the Postgres database running locally.
But because pgadmin is trying to access Postgres from within the docker network; it will be looking for port 5432 instead of 9432 and the container name local_pgdb instead of 127.0.0.1
If I am running from outside the docker; I would use localhost and port 9432. For instance I imported some data to develop off:
Websites store cookies to enhance functionality and personalise your experience. You can manage your preferences, but blocking some cookies may impact site performance and services.
Essential cookies enable basic functions and are necessary for the proper function of the website.
Name
Description
Duration
Cookie Preferences
This cookie is used to store the user's cookie consent preferences.
30 days
These cookies are needed for adding comments on this website.
Name
Description
Duration
comment_author
Used to track the user across multiple sessions.
Session
comment_author_email
Used to track the user across multiple sessions.
Session
comment_author_url
Used to track the user across multiple sessions.
Session
Statistics cookies collect information anonymously. This information helps us understand how visitors use our website.
Google Analytics is a powerful tool that tracks and analyzes website traffic for informed marketing decisions.
Contains information related to marketing campaigns of the user. These are shared with Google AdWords / Google Ads when the Google Ads and Google Analytics accounts are linked together.
90 days
__utma
ID used to identify users and sessions
2 years after last activity
__utmt
Used to monitor number of Google Analytics server requests
10 minutes
__utmb
Used to distinguish new sessions and visits. This cookie is set when the GA.js javascript library is loaded and there is no existing __utmb cookie. The cookie is updated every time data is sent to the Google Analytics server.
30 minutes after last activity
__utmc
Used only with old Urchin versions of Google Analytics and not with GA.js. Was used to distinguish between new sessions and visits at the end of a session.
End of session (browser)
__utmz
Contains information about the traffic source or campaign that directed user to the website. The cookie is set when the GA.js javascript is loaded and updated when data is sent to the Google Anaytics server
6 months after last activity
__utmv
Contains custom information set by the web developer via the _setCustomVar method in Google Analytics. This cookie is updated every time new data is sent to the Google Analytics server.
2 years after last activity
__utmx
Used to determine whether a user is included in an A / B or Multivariate test.
18 months
_ga
ID used to identify users
2 years
_gali
Used by Google Analytics to determine which links on a page are being clicked
30 seconds
_ga_
ID used to identify users
2 years
_gid
ID used to identify users for 24 hours after last activity
24 hours
_gat
Used to monitor number of Google Analytics server requests when using Google Tag Manager